Honeywell T4 Pro Thermostat: Installation Guide
This guide provides a comprehensive overview of the Honeywell T4 Pro thermostat installation, drawing from various resources. It includes steps from initial setup to connecting wires and mounting, ensuring a smooth process. Refer to the user manual for detailed instructions.
Overview of the Honeywell T4 Pro
The Honeywell T4 Pro programmable thermostat is engineered for efficiency and user-friendliness in managing home heating and cooling systems. Its design focuses on providing precise control, allowing homeowners to optimize energy usage and maintain a comfortable environment. The device features an intuitive interface and customizable programming options, which enhance the user experience.
Installation is streamlined with an on-screen menu that guides users through each step, complemented by a universal mounting system for easy setup. The T4 Pro supports various gaming platforms, including Nintendo Switch, Android, iOS, macOS, and Windows PC, showcasing its versatility.
Furthermore, the T4 Pro is designed to be easily integrated into existing home setups. Whether upgrading an old thermostat or installing a new system, the T4 Pro offers a blend of modern technology and practical design, making it a smart choice for home climate control. Detailed installation instructions and user guides are readily available to ensure a seamless experience.
Preparing for Installation
Before installing the Honeywell T4 Pro, safety measures are crucial. Always turn off the power at the breaker or switch. Identify existing wiring to ensure correct connections during the thermostat installation process.
Turning Off Power
Prior to commencing any work on your thermostat, it is paramount to ensure your safety by disconnecting the power supply. Locate the appropriate breaker in your electrical panel that controls the circuit to which your existing thermostat is connected. Switch the breaker to the “off” position.
This action prevents any risk of electrical shock during the installation process. It is advisable to double-check that the power is indeed off by testing the wires with a non-contact voltage tester. This step is essential for a safe and secure thermostat installation. Confirm that the tester shows no voltage present before proceeding further.
Neglecting this critical step can lead to dangerous electrical hazards. So, always prioritize safety by turning off the power before handling any wiring.
Identifying Existing Wiring
Before disconnecting your old thermostat, carefully examine and label each wire connected to its terminals. This crucial step ensures accurate reconnection to the new Honeywell T4 Pro thermostat. Use small pieces of masking tape or wire labels to mark each wire with its corresponding terminal letter or number.
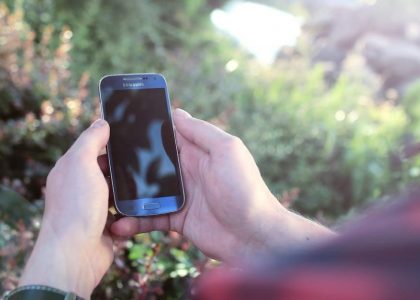
Take a clear photograph of the existing wiring configuration as a backup reference. Note the color of each wire and the terminal to which it is attached. This will be invaluable if the labels become detached or unclear.
If you encounter any wires that are not connected, make a note of their color and position. Understanding the existing wiring setup is essential for a successful installation.
Consult the Honeywell T4 Pro installation manual for specific wiring diagrams and compatibility information.
UWP Mounting System Installation
The UWP (Universal Wiring Plate) mounting system simplifies the installation of the Honeywell T4 Pro thermostat. Ensure power is off before proceeding. Position, level, and secure the UWP to the wall using provided hardware for a stable base.
Positioning the UWP
Properly positioning the Universal Wiring Plate (UWP) is critical for a successful thermostat installation; Begin by selecting a location on the wall that is free from obstructions and representative of the average room temperature. Avoid areas near drafts, direct sunlight, or heat sources, as these can affect the thermostat’s accuracy.
Hold the UWP against the wall and use a level to ensure it is perfectly horizontal. This will not only enhance the appearance of the installed thermostat but also ensure that it functions correctly. Once leveled, use a pencil to lightly mark the positions for the mounting screws through the UWP’s mounting holes.
Double-check the placement to confirm it aligns with any existing wiring and that there is sufficient space for the thermostat to be easily viewed and accessed. Accurate positioning at this stage will prevent issues later in the installation process.
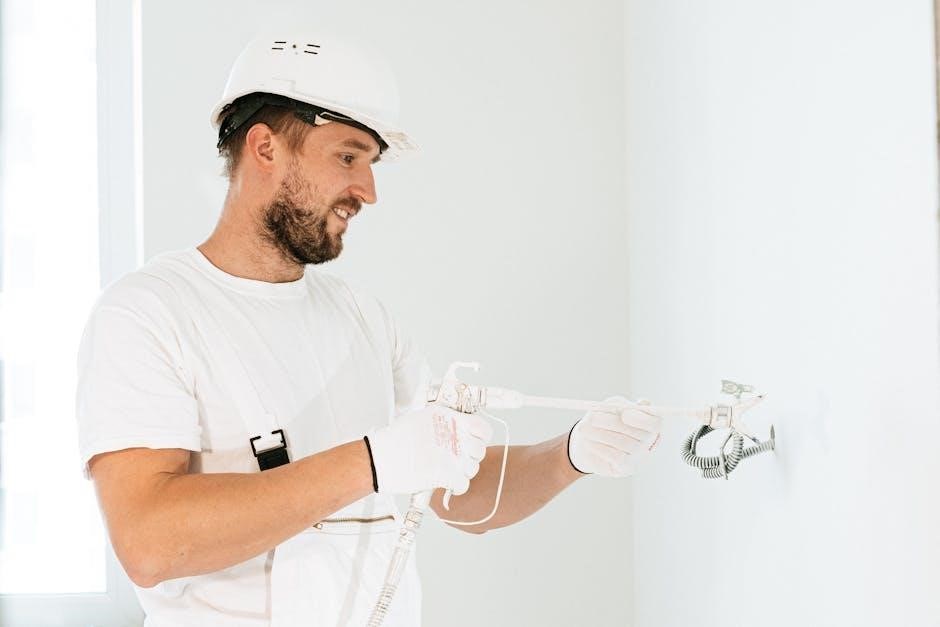
Drilling and Anchoring
After marking the screw positions, the next step involves drilling pilot holes into the wall. Use a drill bit size appropriate for the wall anchors provided with the Honeywell T4 Pro thermostat. If drilling into drywall, insert the provided wall anchors into the drilled holes. Lightly tap the anchors into the wall using a hammer until they are flush with the surface.
For harder surfaces like plaster or wood, you may need to use different types of drill bits and anchors suitable for those materials. Ensure the anchors are securely seated in the wall to provide a stable base for mounting the UWP. This secure attachment is essential for preventing the thermostat from becoming loose over time.
Take care not to overtighten the screws when attaching the UWP, as this can damage the wall or strip the screw holes. A snug fit is all that is necessary to ensure the UWP is firmly in place.
Optional Cover Plate Installation
The Honeywell T4 Pro thermostat offers an optional cover plate for installations requiring it. This section details when to use the cover plate and the steps for proper attachment, ensuring a clean installation.
When to Use the Cover Plate
The optional cover plate for the Honeywell T4 Pro thermostat serves specific purposes during installation. Primarily, it is utilized when mounting the thermostat to an electrical junction box. This ensures that the wiring is safely enclosed and complies with electrical codes. The cover plate is also beneficial when the existing mounting location has blemishes or holes that need to be concealed for aesthetic reasons.
Additionally, the cover plate provides a larger surface area for mounting, which can be helpful if the wall surface is uneven or damaged. It offers a stable and secure base for the thermostat, preventing any wobbling or instability. In cases where the previous thermostat left behind unsightly marks or exposed wires, the cover plate offers a neat and professional solution.
Therefore, consider using the cover plate to enhance both the functionality and appearance of your T4 Pro thermostat installation.
Attaching the Cover Plate
To attach the cover plate for the Honeywell T4 Pro thermostat, begin by separating the junction box adapter from the cover plate if they are pre-assembled. Position the cover plate over the electrical junction box or the desired location on the wall. Ensure that the plate is level and aligned correctly for a professional appearance.
Using the supplied screws, secure the cover plate to the wall. For installations involving electrical junction boxes, use screws that are appropriate for the box’s mounting holes. If mounting directly to the wall, consider using wall anchors to provide a more secure hold, especially on drywall.
Once the cover plate is firmly attached, proceed with the installation of the UWP (Universal Wall Plate). The UWP will then mount onto the cover plate, providing a stable base for the thermostat itself. This ensures that the thermostat is securely and neatly installed, enhancing both its functionality and aesthetic appeal.

Wiring the Thermostat
Connect the appropriate wires to the thermostat terminals based on your system configuration. Ensure all connections are secure and match the wiring diagram in the T4 Pro installation manual for optimal performance.
Connecting Wires to Terminals
Before connecting any wires, ensure the power is turned off at the breaker. Refer to the wiring diagram in the Honeywell T4 Pro installation manual to identify the correct terminals for your specific heating and cooling system. Carefully match each wire from your existing system to the corresponding terminal on the thermostat’s UWP (Universal Wiring Platform).
Use a small screwdriver to loosen the terminal screws, insert the wire, and then tighten the screw to secure the connection. Tug gently on each wire to ensure it is firmly attached. Double-check all connections against the wiring diagram before proceeding. Incorrect wiring can damage your system or the thermostat. If you are unsure about any connection, consult a qualified HVAC technician. Document each step and always follow the manufacturer’s instructions for a safe and effective installation.
Thermostat Mounting and Setup
After wiring, mount the thermostat onto the UWP. Close the UWP door, ensuring no wires are bulging. Then, follow the on-screen menus for initial configuration, customizing settings as needed for optimal performance.
Closing the UWP Door
Once all wiring connections are securely made to the terminals on the UWP (Universal Wiring Plate), carefully manage the excess wire. Gently push any extra wire back into the wall opening to create space for the thermostat to sit flush against the wall. This step is crucial to prevent any obstruction or pressure on the wires, which could potentially lead to connection issues or damage over time.
With the wires neatly tucked away, proceed to close the UWP door. Ensure that the door closes completely and remains securely fastened without any bulging. Bulging indicates that there is still excessive wire behind the plate, which needs to be rearranged. A properly closed UWP door signifies that the wiring is correctly positioned and the thermostat can be mounted without any interference.
This step ensures a clean and professional installation, contributing to the overall reliability and longevity of your Honeywell T4 Pro thermostat system.
Initial Configuration
After successfully mounting the Honeywell T4 Pro thermostat, the next crucial step is the initial configuration. This process involves setting up the thermostat according to your specific heating and cooling system and preferences. Upon powering on the thermostat, you will be guided through a series of on-screen menus that prompt you to input necessary information.
Typically, the initial configuration includes setting the date and time, which are essential for accurate scheduling and programming. You will also need to configure the system type, specifying whether you have a heat pump, conventional heating, or cooling system. This setting ensures that the thermostat operates correctly with your HVAC setup.
Further customization options may include setting temperature preferences, programming schedules, and adjusting other advanced settings to optimize energy efficiency and comfort. Carefully follow the on-screen instructions and refer to the user manual for detailed explanations of each setting. Proper initial configuration is vital for the thermostat to function optimally and meet your specific needs.
GameSir T4 Pro Controller
The GameSir T4 Pro controller is a versatile device compatible with multiple platforms, including PC and Android. Connection instructions vary depending on the device; Refer to the manual for setup details.
Connecting to PC
To connect your GameSir T4 Pro controller to a PC, begin by ensuring the controller has sufficient battery or is connected via USB. For a wired connection, simply plug the controller into a USB port on your computer. Windows should automatically recognize the device and install the necessary drivers. If drivers aren’t automatically installed, you might need to manually install them from the GameSir website or through Windows Update.
For a wireless connection, if your PC has Bluetooth, turn on the controller by pressing the appropriate button combination, usually the ‘Home’ button and another designated button for PC connectivity, as specified in the GameSir T4 Pro manual; Then, enable Bluetooth on your PC and search for available devices. Select the GameSir T4 Pro from the list of available devices and pair them.
If your PC does not have Bluetooth, you can use a USB receiver. Insert the receiver into a USB port on your PC. Turn on the controller as described in the manual and the controller should connect automatically. Ensure the controller is in the correct mode for PC use, indicated by LED indicators.
Connecting to Android Devices
To connect your GameSir T4 Pro controller to an Android device, start by ensuring Bluetooth is enabled on your Android device. Power on the GameSir T4 Pro controller by pressing the ‘Home’ button along with the ‘A’ button, which typically designates Android connection mode. The LED indicators on the controller should blink, indicating it is in pairing mode.
On your Android device, navigate to the Bluetooth settings and scan for available devices. You should see the GameSir T4 Pro listed among the available devices. Select it to initiate the pairing process. Your Android device may prompt you to confirm the pairing; accept the request.
Once paired, the LED indicators on the controller should become solid, indicating a successful connection. You can now use the GameSir T4 Pro to play games that support controller input on your Android device. If the controller does not function as expected, ensure that the game you are playing supports controller input and that the controller is configured correctly within the game settings. In some cases, you might need to use a key mapping app to customize the controller inputs for specific games.