
Welcome to the Honeywell Security Pad Manual, your comprehensive guide to understanding and utilizing your security system effectively. This manual is designed for homeowners and installers, covering installation, programming, daily use, and troubleshooting. It ensures optimal performance and security.
1.1. What is the Honeywell Security Pad?
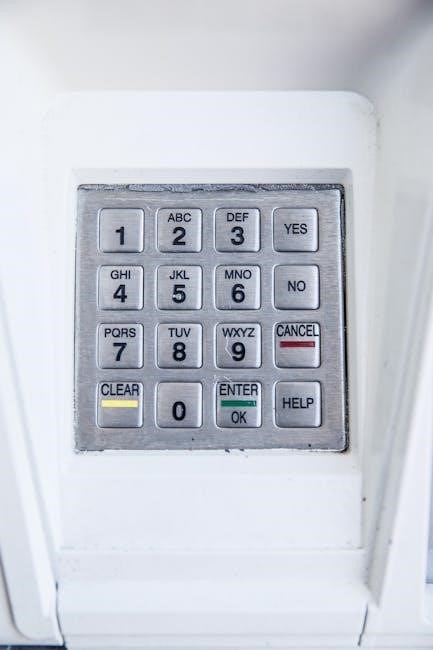
The Honeywell Security Pad is a user-friendly interface designed to interact with your home or business security system. It serves as a centralized control panel, allowing you to arm, disarm, and monitor your security setup. The pad typically features a keypad for entering codes, along with indicator lights and buttons for quick access to system functions. It integrates seamlessly with Honeywell’s security systems, enabling features like zone management, chime modes, and emergency alerts. The security pad is essential for managing your security setup efficiently, ensuring your property and loved ones remain protected. This manual will guide you through its operation, programming, and troubleshooting, helping you maximize its capabilities and maintain a secure environment;
1.2. Key Features and Benefits of the Honeywell Security Pad
The Honeywell Security Pad offers a range of innovative features designed to enhance home security and user convenience. Key benefits include intuitive arming and disarming, customizable chime modes, and the ability to program multiple user codes with varying access levels. Its robust zone configuration allows for tailored security setups, ensuring specific areas of your home are monitored according to your needs.
- Customizable Alerts: Receive notifications for zone breaches, ensuring prompt action during potential threats.
- Chime Mode: Distinguish between alarm triggers and everyday movements with distinct tones.
- Integration Capabilities: Seamlessly connect with other Honeywell devices for a unified security system.
- Battery Backup: Continuous operation during power outages, ensuring uninterrupted protection.
These features combine to provide a reliable, adaptable, and user-friendly security solution, making the Honeywell Security Pad an excellent choice for modern homes.
1.3. Importance of the Honeywell Security Pad Manual
The Honeywell Security Pad Manual is an essential resource for understanding and maximizing the potential of your security system. It provides clear instructions for installation, programming, and daily operations, ensuring users can navigate the system confidently. Whether you’re a homeowner or an installer, the manual offers troubleshooting guides to resolve common issues, such as forgotten codes or communication errors, and step-by-step solutions to address these problems effectively.
- Comprehensive Guidance: Covers everything from basic setup to advanced configurations.
- Troubleshooting Support: Helps identify and fix errors quickly, minimizing downtime.
- Customization Tips: Explains how to tailor settings, such as chime modes and access levels, to meet specific needs.
By following the manual, users can ensure their system operates at peak performance, providing reliable security and peace of mind. It’s a vital tool for maintaining and optimizing your Honeywell Security Pad.

Installation and Setup of Honeywell Security Pad
Installing the Honeywell Security Pad requires careful preparation and adherence to the pre-installation checklist. Ensure proper wiring and connectivity to the control panel for seamless functionality and reliable security system operation.
2.1. Pre-Installation Checklist
Before installing the Honeywell Security Pad, ensure the following steps are completed to guarantee a smooth and successful setup process:
- Verify the location for the keypad, ensuring it is easily accessible and visible for daily use.
- Check the power supply requirements and ensure all necessary cables and adapters are available.
- Confirm compatibility with your existing security system or control panel.
- Inspect the keypad for any damage or defects before proceeding with installation.
- Gather all necessary tools, such as screwdrivers and wire strippers, depending on your setup.
- Ensure you have the correct installation manual and any additional documentation provided by Honeywell.
- If applicable, have the master code or installer code ready for initial configuration.
- Test the keypad’s communication with the control panel before final installation to avoid connectivity issues.
By completing these steps, you can ensure your Honeywell Security Pad is installed correctly and functions as intended.
2.2. Step-by-Step Installation Guide
Begin by powering down the security system and disconnecting the battery to avoid any accidental triggers. Wait for at least one minute to ensure the system is fully deactivated. Reconnect the battery and plug in the control panel. For a new keypad, address it by holding the 1 and 3 keys simultaneously until the system acknowledges it. Once connected, initialize the system by entering the default code (usually 1234) and pressing OK. If the keypad doesn’t respond, repeat the addressing process. After initialization, program the time and date by navigating to the system settings menu. Finally, test the system by arming and disarming it to ensure proper functionality. Refer to the manual for specific button sequences and troubleshooting tips to resolve any installation issues.
2.3. Wiring and Connectivity Requirements
Proper wiring and connectivity are essential for the Honeywell Security Pad to function correctly. The system typically requires a 4-wire connection, including power, ground, and data lines. Ensure the control panel is connected to a stable power supply, usually 12-24V DC, and that all wires are securely fastened to avoid interference. For wireless configurations, ensure the keypad is paired with the control panel using the correct enrollment process. A backup battery is recommended to maintain functionality during power outages. Incorrect wiring can lead to system malfunctions or false alarms. Always refer to the wiring diagram provided in the manual or consult a professional for complex setups. Proper connectivity ensures reliable communication between the keypad and the control panel, guaranteeing your security system operates seamlessly.

Programming the Honeywell Security Pad
Programming your Honeywell Security Pad involves setting up user codes, access levels, and configuring zones and sensors. Start with basic steps like initializing the system and setting the date and time. Use the default programmer code, often 1-7-9-3 or 9-3-1-7, to access the programming menu. Assign sensors to specific zones to monitor different areas of your home. Test each zone to ensure proper functionality. If issues arise, resetting the system by removing the battery for five seconds can help. Keep your codes secure and test configurations thoroughly for optimal security.
3.1. Basic Programming Steps for Honeywell Security Pad
Programming your Honeywell Security Pad is essential for customizing its functionality to meet your security needs. Begin by entering the installer code, typically found in the manual or on the Honeywell website. Once logged in, navigate to the programming menu. Here, you can set user codes, adjust sensor sensitivity, and configure system responses. Save your changes before exiting. Testing the system post-programming ensures all settings function correctly. Always refer to the manual for specific instructions tailored to your model. Regular updates and firmware checks are recommended to maintain optimal performance and security. If unsure, consult a professional for assistance. Proper programming ensures your system operates efficiently, providing reliable protection for your home or business. This step-by-step process guarantees a seamless setup experience, allowing you to enjoy enhanced security features. For detailed guidance, refer to the Honeywell Security Pad Manual or official support resources.
3.2. Setting Up User Codes and Access Levels
Setting up user codes and access levels on your Honeywell Security Pad is essential for maintaining security and convenience. Begin by accessing the programming menu using the master code, typically found in the manual or default settings like 1234. Once logged in, navigate to the user management section to create new codes. Each code should be unique and strong to prevent unauthorized access. Assign access levels based on user roles—basic users might only arm/disarm the system, while administrators can manage codes and settings. Ensure secure communication of codes to users, avoiding insecure methods like email. Regularly review and update codes, especially when users leave, to maintain security. Test all codes post-setup to ensure functionality. Refer to the manual or online tutorials for detailed guidance. This structured approach ensures robust security and user convenience.
3.3. Configuring Zones and Sensors
Configuring zones and sensors is essential for tailoring your Honeywell security system to your specific needs. Zones represent different areas of your property, such as doors, windows, or motion detectors, while sensors detect activity and trigger alerts. To configure zones, access the programming menu and assign each sensor to a zone based on its location and function; Ensure sensors are installed correctly and test their range to avoid false alarms. For motion detectors, adjust sensitivity settings to account for pets or high-traffic areas. Door and window sensors should be aligned properly to maintain connectivity. After configuration, test the system by triggering each sensor to confirm it communicates with the control panel. Proper zone setup ensures precise alerts and enhances security. Regularly review and update zone configurations as your security needs change.

Daily Operations and Usage of Honeywell Security Pad

Mastering daily operations ensures seamless security management. Learn to arm/disarm the system, bypass zones, and manage alerts efficiently. Customize settings like chime mode for enhanced convenience and personalized security experiences.
4.1. Arming and Disarming the Security System
Arming and disarming your Honeywell Security Pad is a straightforward process. To arm the system, enter your four-digit user code and press the “Arm” button. The system will confirm with a beep and display an armed status. For disarming, re-enter your code and press “Disarm.” If you forget your code, try default codes like 1234 or 1111, which are often factory settings. If these fail, resetting the system by removing the battery for five seconds may help. New homeowners should contact an alarm company to reset the system if previous codes are unknown. Always ensure the system is disarmed before leaving to avoid false alarms. Regularly update your codes for enhanced security. Refer to the troubleshooting guide for additional assistance with arming or disarming issues.
4.2. Bypassing Zones and Managing Alerts
Bypassing zones on your Honeywell Security Pad allows you to deactivate specific sensors or zones temporarily without disarming the entire system. This feature is useful for granting access to certain areas while maintaining overall security. To bypass a zone, enter your master code, navigate to the zone bypass menu, and select the zones you wish to bypass. Once confirmed, the system will ignore alarms from those zones until reactivated.
Managing alerts involves addressing notifications from the system, such as zone violations or communication issues; Check the keypad display for error codes, which provide specific details about the alert. For instance, a “Check 100” code may indicate a communication failure with the control panel. Resolve these issues by verifying wiring, ensuring proper connectivity, or consulting the manual for troubleshooting steps. Regularly reviewing and clearing alerts ensures your system operates efficiently and maintains your home’s security.
4.3. Using Chime Mode and Customizing Settings
The Honeywell Security Pad offers a convenient Chime Mode, which provides audible alerts for system events like door openings or sensor activations. To enable or disable Chime Mode, enter your four-digit code and press the number 9. This feature is ideal for monitoring activity without triggering full alerts. Additionally, you can customize settings such as volume levels, tone preferences, and notification types to suit your needs.
Customizing settings on the Honeywell Security Pad allows for personalized system behavior. Users can adjust chime tones, set silent modes, or modify alert durations. For instance, you can program specific sounds for different zones or events, enhancing your system’s functionality and user experience. These settings are easily accessible through the keypad interface, ensuring seamless adjustments to match your preferences.
If you encounter issues with Chime Mode or custom settings, resetting the system by removing the battery for five seconds and reinstalling it can resolve many problems. This simple step often restores default settings and ensures proper functionality. Always refer to your manual for detailed instructions on customization and troubleshooting.

Troubleshooting Common Issues with Honeywell Security Pad
Troubleshooting your Honeywell Security Pad involves identifying error codes, resolving communication issues, and addressing keypad malfunctions. Common problems include keypad errors, sensor connectivity issues, and system alerts. Resetting the system by removing the battery for five seconds and reinstalling it often resolves many issues. Always refer to your manual for detailed solutions and guidance.
5.1. Identifying Common Problems and Error Codes
Identifying common problems and error codes on your Honeywell Security Pad is crucial for maintaining system functionality. Error codes like “Check 09” often indicate communication issues between the keypad and the control panel. Other codes may point to zone faults, incorrect user codes, or low battery levels. If the system displays “FC,” it could signify a failure in the communication pathway. Users may also encounter issues like keypad malfunctions or chime mode not deactivating properly. For instance, if the chime doesn’t turn off after entering the code and pressing 9, it might indicate a software glitch. Additionally, if the system arms or disarms unexpectedly, it could signal a zone or sensor misconfiguration. Always refer to the error code list in the manual to diagnose the issue accurately. If problems persist, resetting the system by disconnecting the battery or contacting a professional may be necessary. Regular checks can help prevent recurring issues.
5.2. Resolving Communication Issues with the Control Panel

Communication issues between the Honeywell Security Pad and the control panel can disrupt system functionality. First, check for error codes on the keypad, which often indicate specific problems. Verify wiring connections to ensure they are secure and undamaged. Power cycle the system by disconnecting the battery, waiting one minute, and reconnecting it. If issues persist, ensure the keypad is properly addressed to the control panel. For new keypads, hold down the 1 and 3 keys to establish communication. Additionally, verify that the control panel’s programming matches the keypad settings. If the problem remains unresolved, contact a professional to inspect the system. Regular maintenance and software updates can prevent such issues. Always refer to the manual for specific troubleshooting steps tailored to your system model.
5.3. Fixing Keypad Malfunctions and Connectivity Problems
Malfunctions in the Honeywell Security Pad often stem from connectivity issues or hardware problems. If the keypad is unresponsive, try rebooting the system by disconnecting and reconnecting the power supply. Check for loose wires or damaged connections, as these can disrupt communication with the control panel. Battery-powered keypads may require replacing the batteries with high-quality alternatives to ensure stable performance.

If the keypad display is not lighting up, ensure the backlight feature is enabled. For connectivity issues, verify that the keypad is properly enrolled with the control panel. Resetting the keypad by holding down the * and # keys for 5 seconds can often resolve enrollment problems. If issues persist, refer to the default programmer code (e.g., 1-7-9-3 or 9-3-1-7) to regain access and reprogram the system. Always test the keypad after troubleshooting to confirm functionality. If problems remain unresolved, contact a certified Honeywell technician for professional assistance.

Best Practices and Maintenance for Honeywell Security Pad
Regularly inspect sensors and wiring for damage. Update software and firmware promptly. Test the system monthly and ensure backup power sources are functional. Train users on basic operations and schedule professional inspections annually for optimal performance.
6.1. Regular Maintenance Tips for Optimal Performance
Regular maintenance is essential to ensure your Honeywell Security Pad operates efficiently and reliably. Start by checking and replacing the battery annually, as a drained battery can lead to system malfunctions. Clean the keypad regularly with a soft cloth to prevent dust buildup, which may interfere with button functionality. Inspect all sensors and wires for damage or wear, and secure any loose connections. Update your system’s software and firmware whenever new versions are released to benefit from improved features and security patches. Test your system monthly by arming and disarming it to ensure everything works smoothly. Additionally, monitor the system for error codes and address them promptly to avoid potential issues. Finally, schedule an annual professional inspection to identify and resolve hidden problems before they escalate. By following these maintenance tips, you can extend the lifespan of your Honeywell Security Pad and maintain peak performance.
6.2. Updating Software and Firmware
Regularly updating the software and firmware of your Honeywell Security Pad is crucial for maintaining optimal performance, security, and functionality. Honeywell periodically releases updates to enhance system capabilities, fix bugs, and improve compatibility. To update, ensure your system is connected to the internet or use a USB device if offline. Visit Honeywell’s official website for the latest update files and detailed instructions. Always back up your settings before proceeding. If an update fails, restart the system or contact Honeywell support for assistance. Avoid interrupting the update process to prevent potential system instability. For automatic updates, enable the feature in your system settings. Stay informed about new releases through Honeywell’s notifications or user forums for tips and troubleshooting advice. Updating ensures your security system remains reliable and up-to-date with the latest features.